发布于Router分类中的文章

Aug 18

软件源配置文件是 /etc/apt/sources.list。将系统自带的该文件做个备份,将该文件替换为下面内容,即可使用 TUNA 的软件源镜像。

如果遇到无法拉取 https 源的情况,请先使用 http 源并安装:
$ sudo apt install apt-transport-https

# 默认注释了源码镜像以提高 apt update 速度,如有需要可自行取消注释
deb https://mirrors.tuna.tsinghua.edu.cn/debian/ buster main contrib non-free
# deb-src https://mirrors.tuna.tsinghua.edu.cn/debian/ buster main contrib non-free
deb https://mirrors.tuna.tsinghua.edu.cn/debian/ buster-updates main contrib non-free
# deb-src https://mirrors.tuna.tsinghua.edu.cn/debian/ buster-updates main contrib non-free
deb https://mirrors.tuna.tsinghua.edu.cn/debian/ buster-backports main contrib non-free
# deb-src https://mirrors.tuna.tsinghua.edu.cn/debian/ buster-backports main contrib non-free
deb https://mirrors.tuna.tsinghua.edu.cn/debian-security buster/updates main contrib non-free
# deb-src https://mirrors.tuna.tsinghua.edu.cn/debian-security buster/updates main contrib non-free

清华大学开源软件镜像站
镜像使用帮助


Apr 26

2019-04-26_134016_cr.png

1. 参照下面两篇文章:

Cannot come back from advanced tomato to asus merlin

Just thought I'd add a pointer to this post for anyone wishing to move from this fork to the latest Merlin builds on the ARM routers.

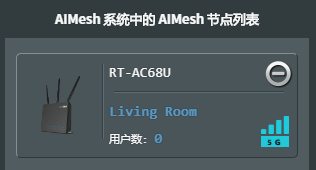
通过过渡固件把 68U 的固件升级到最新版: Version 3.0.0.4.384.45713;

2. 主路由可以是普通路由模式或者 AP 模式;

3. 扩展路由选 AiMesh 模式或者直接按住 reset 重置;

4. 主路由 AiMesh 界面,等待扩展路由无线灯全亮后会找到扩展路由,加入即可。

Tags: ,

Mar 30

NFS 比 SAMBA 稳定,速度也快,所以决定用 NFS 取代 PHICOMM N1上的 SAMBA 共享。

一. 服务端,N1 运行 Ubuntu 18.04 版本,IP 为 192.168.2.20。

1. 首先停用 SAMBA。

sudo systemctl stop smbd
sudo systemctl disable smbd

2. 安装 NFS 服务组件:

sudo apt-get install nfs-kernel-server

3. 配置 NFS:

sudo nano /etc/exports

添加需要共享的目录,例如:

#共享目录 #允许的客户端网段(挂载选项)
/sync 192.168.2.0/24(rw,sync,no_subtree_check)

如果要为 Android 系统(例如电视盒子等)或者 OSX 等提供服务,需要加 insecure 参数:

#共享目录 #允许的客户端网段(挂载选项)
/sync 192.168.2.0/24(rw,async,insecure,no_subtree_check)

4. 重启 NFS 服务即可:

sudo systemctl restart nfs-server

二. 客户端,Windows 10,需要企业版。

1. 首先启用 NFS 客户端:控制面板\程序\程序和功能 - 启用或关闭 Windows 功能,选中 NFS 服务 下的 NFS 客户端

2. 此时进入 CMD 命令行可以测试连接:

showmount -e 192.168.2.20

完整用法

showmount -e [server] 显示 NFS 服务器导出的所有共享。
showmount -a [server] 列出客户端主机名或 IP 地址,以及使用“主机:目录”格式显示的安装目录。
showmount -d [server] 显示 NFS 服务器上当前由某些 NFS 客户端安装的目录。

3. 此时挂载后只能读不能写,如需读写,需要修改注册表:
通过修改注册表将 Windows 10 访问 NFS 时的 UID 和 GID 改成 0 即可(其实就是 Linux 下的 root),步骤如下:
a、在运行中输入 regedit,打开注册表编辑器;
b、进入 HKEY_LOCAL_MACHINE\SOFTWARE\Microsoft\ClientForNFS\CurrentVersion\Default 条目;
c、选择新建 DWORD 值,新建 AnonymousUid,AnonymousGid 两个值,值为 0;
d、重启系统;

4. 如临时使用,可用命令行挂载:

mount \\192.168.2.20\sync S:

注意,如果挂载后在我的电脑里不显示盘符,请退出管理员权限的 CMD,卸载后在普通权限的 CMD 下重新挂载!

完整用法:

用法: mount [-o options] [-u:username] [-p: ] <\\computername\sharename>

-o rsize=size 设置读取缓冲区的大小(以 KB 为单位)。
-o wsize=size 设置写入缓冲区的大小(以 KB 为单位)。
-o timeout=time 设置 RPC 调用的超时值(以秒为单位)。
-o retry=number 设置软装载的重试次数。
-o mtype=soft|hard 设置装载类型。
-o lang=euc-jp|euc-tw|euc-kr|shift-jis|big5|ksc5601|gb2312-80|ansi
指定用于文件和目录名称的编码。
-o fileaccess=mode 指定文件的权限模式。
这些模式用于在 NFS 服务器上创建的
新文件。使用 UNIX 样式模式位指定。
-o anon 作为匿名用户装载。
-o nolock 禁用锁定。
-o casesensitive=yes|no 指定在服务器上执行区分大小写的文件查找。
-o sec=sys|krb5|krb5i|krb5p

5. 如需要重启后自动挂载,可以向添加 SAMBA 共享一样使用磁盘映射,格式也一样,但需要注意:卸载时不要使用资源管理器的 “断开网络驱动器”,要去命令行用:

umount S:

卸载,如果要卸载全部 NFS 网络驱动器,用:

umount -f -a


Mar 03

好吧,Tomatoware 1.7 已经基于 OpenSSL 1.1.1b 编译,本文可以不看了。

~~~~~


:mrgreen: :mrgreen: :mrgreen:


Dec 28

Stubby 是一款支持 DNS-over-TLS 的 DNS 服务器,详情可参考:

https://dnsprivacy.org/wiki/display/DP/DNS+Privacy+Daemon+-+Stubby

要支持 TLS 1.3,必须先编译 OpenSSL 1.1.1

cd /mnt/data/compile/openssl-1.1.1/
./config
make
mkdir lib
cp libssl.a libcrypto.a lib/
cp include/openssl/* include/

注意,为了不影响原系统,并不安装此 OpenSSL 版本!

还需要编译 libyaml 支持库:

cd /mnt/data/compile/yaml-0.2.1/
./configure --enable-static --disable-shared --prefix=/mmc
make install

然后通过 getdns 静态编译出 Stubby:

cd /mnt/data/compile/getdns-1.5.0/
LDFLAGS="-Wl,-static -static -static-libgcc -s" ./configure --disable-shared --without-libunbound --without-libidn --without-libidn2 --with-ssl=/mnt/data/compile/openssl-1.1.1 --with-stubby --with-piddir=/var/run --prefix=/opt
make

就可以在 src 下得到需要的文件:

file src/stubby
src/stubby: ELF 32-bit LSB executable, ARM, EABI5 version 1 (GNU/Linux), statically linked, stripped, with debug_info


Oct 12

源码: Psiphon 3 Tunnel Core 项目
编译:
原项目中关于编译说的比较简单笼统,这里详细说下。
首先确认 Go 编译环境已经安装好,可以参考 Tomatoware ARM 下建立 Go 编译环境 一文。
然后要下载一些依赖及源程序:
go get -u -v github.com/Psiphon-Inc/bolt
go get -u -v github.com/Psiphon-Inc/dns
go get -u -v github.com/Psiphon-Inc/goptlib
go get -u -v github.com/Psiphon-Inc/goregen
go get -u -v github.com/Psiphon-Inc/ratelimit
go get -u -v github.com/Psiphon-Inc/crypto/nacl/box
go get -u -v github.com/Psiphon-Inc/crypto/nacl/secretbox
go get -u -v github.com/Psiphon-Inc/crypto/ssh
go get -u -v github.com/Psiphon-Inc/goarista/monotime
go get -u -v github.com/Psiphon-Inc/goselect
go get -u -v github.com/Psiphon-Inc/sss
go get -u -v github.com/Psiphon-Inc/gocapability/capability
go get -u -v github.com/Psiphon-Inc/m3u8
go get -u -v github.com/Psiphon-Labs/psiphon-tunnel-core

写个编译脚本:

#!/bin/sh

WORKDIR=$(pwd)

cd src/github.com/Psiphon-Labs/psiphon-tunnel-core

BUILDDATE=$(date --iso-8601=seconds)
BUILDREPO=$(git config --get remote.origin.url)
BUILDREV=$(git rev-parse --short HEAD)
GOVERSION=$(go version | perl -ne '/go version (.*?) / && print $1')
DEPENDENCIES=$(echo -n "{" && go list -f '{{range $dep := .Deps}}
{{printf "%sn" $dep}}{{end}}' | xargs go list -f '{{if not .Standard}}
{{.ImportPath}}{{end}}' | xargs -I pkg bash -c 'cd $GOPATH/src/pkg
 && echo -n "\"pkg\":\"$(git rev-parse --short HEAD)\","' | sed 's/,$/}/')

LDFLAGS="
-X github.com/Psiphon-Labs/psiphon-tunnel-core/psiphon/common.buildDate=$BUILDDATE 
-X github.com/Psiphon-Labs/psiphon-tunnel-core/psiphon/common.buildRepo=$BUILDREPO 
-X github.com/Psiphon-Labs/psiphon-tunnel-core/psiphon/common.buildRev=$BUILDREV 
-X github.com/Psiphon-Labs/psiphon-tunnel-core/psiphon/common.goVersion=$GOVERSION 
-X github.com/Psiphon-Labs/psiphon-tunnel-core/psiphon/common.dependencies=$DEPENDENCIES 
"

cd ConsoleClient && go build -ldflags "${LDFLAGS}"
mv -f ./ConsoleClient ${WORKDIR}/bin/psiphon-tunnel-core-$BUILDREV
cd ${WORKDIR}
strip bin/psiphon-tunnel-core-$BUILDREV
upx -9 bin/psiphon-tunnel-core-$BUILDREV

bin/psiphon-tunnel-core-$BUILDREV

命令行运行:
./psiphon-tunnel-core -config ./psiphon.config -serverList ./server_list.dat -listenInterface br0 -formatNotices

psiphon.config 以及 server_list.dat 文件可以从 Windows 版本的 Psiphon3 (赛风3) 安装版本中提取。
运行结果:
psiphon-tunnel-core: Starting psiphon-tunnel-core...
2016-10-12T02:52:38Z BuildInfo {"buildDate":"2016-09-27T16:28:36+08:00","buildRepo":"https://github.com/Psiphon-Labs/psiphon-tunnel-core","buildRev":"31dad76","goVersion":"go1.6","gomobileVersion":"go1.6"}
2016-10-12T02:52:38Z AvailableEgressRegions {"regions":["CA","DE","GB","IN","JP","NL","SG","US"]}
2016-10-12T02:52:38Z ListeningSocksProxyPort {"port":7788}
2016-10-12T02:52:38Z ListeningHttpProxyPort {"port":8788}
2016-10-12T02:52:38Z ImpairedProtocolClassification {"classification":{}}
2016-10-12T02:52:38Z CandidateServers {"count":153,"protocol":"","region":""}
2016-10-12T02:52:42Z Homepage {"url":"http://www.psiphontoday.com/zh/index_desktop.html?client_region=CN"}
2016-10-12T02:52:42Z ClientUpgradeAvailable {"version":"116"}
2016-10-12T02:52:42Z Tunnels {"count":1}

出现 Tunnels {"count":1} 字样就表示连接服务器成功了。

新版编译出错:
# github.com/Psiphon-Labs/psiphon-tunnel-core/psiphon/common/tls
/mnt/data/compile/go/src/github.com/Psiphon-Labs/psiphon-tunnel-core/psiphon/common/tls/tls.go:106: undefined: deadlineTimeout

修改:

if !dialer.Deadline.IsZero() {
  		deadlineTimeout := dialer.Deadline.Sub(time.Now())
  		if timeout == 0 || deadlineTimeout < timeout {
  			timeout = deadlineTimeout
  		}
  	}

参考: https://github.com/golang/go/issues/14595

May 10

其实就是注意 -ldl 放的位置,之前放在 LDFLAGS 最后老是提示 -lcrypto 错误(这样放,在路由器上编译好像没事~~ :evil: ):

make clean

LIBS="-ldl" LDFLAGS="-Wl,-static -static -static-libgcc" ./configure --host=arm-brcm-linux-uclibcgnueabi CC=arm-brcm-linux-uclibcgnueabi-gcc --with-openssl=/home/punk/arm_apps/libs/openssl

make -j`nproc`


Apr 18

出错提示为:

/opt/brcm-arm/bin/../libexec/gcc/arm-brcm-linux-uclibcgnueabi/4.5.3/cc1: error while loading shared libraries: libmpc.so.2: cannot open shared object file: No such file or directory

或者:

configure: error: C compiler cannot create executables

执行:

ldd /opt/brcm-arm/libexec/gcc/arm-brcm-linux-uclibcgnueabi/4.5.3/cc1

发现有库未找到:

linux-gate.so.1 => (0xf77bf000)
libmpc.so.2 => not found
libmpfr.so.4 => not found
libgmp.so.10 => not found
libdl.so.2 => /lib/i386-linux-gnu/libdl.so.2 (0xf77aa000)
libelf.so.1 => /usr/lib/i386-linux-gnu/libelf.so.1 (0xf7792000)
libc.so.6 => /lib/i386-linux-gnu/libc.so.6 (0xf75e3000)
/lib/ld-linux.so.2 (0xf77c0000)

解决方法,编译前执行:

export LD_LIBRARY_PATH=${LD_LIBRARY_PATH}:/opt/brcm-arm/lib:/usr/local/lib:/usr/lib

再用上面的命令检查依赖库,结果没有依赖库未找到了:

linux-gate.so.1 => (0xf76f4000)
libmpc.so.2 => /opt/brcm-arm/lib/libmpc.so.2 (0xf76de000)
libmpfr.so.4 => /opt/brcm-arm/lib/libmpfr.so.4 (0xf768e000)
libgmp.so.10 => /opt/brcm-arm/lib/libgmp.so.10 (0xf7631000)
libdl.so.2 => /lib/i386-linux-gnu/libdl.so.2 (0xf7620000)
libelf.so.1 => /usr/lib/i386-linux-gnu/libelf.so.1 (0xf7608000)
libc.so.6 => /lib/i386-linux-gnu/libc.so.6 (0xf7459000)
libm.so.6 => /lib/i386-linux-gnu/libm.so.6 (0xf7412000)
/lib/ld-linux.so.2 (0xf76f5000)

编译也没问题了 :mrgreen:


Apr 17

直接编译会出错:

/opt/lib//libcrypto.a(c_zlib.o): In function zlib_stateful_expand_block': c_zlib.c:(.text+0x54): undefined reference toinflate'
/opt/lib//libcrypto.a(c_zlib.o): In function zlib_stateful_compress_block': c_zlib.c:(.text+0xd8): undefined reference todeflate'
/opt/lib//libcrypto.a(c_zlib.o): In function bio_zlib_free': c_zlib.c:(.text+0x128): undefined reference toinflateEnd'
c_zlib.c:(.text+0x144): undefined reference to deflateEnd' /opt/lib//libcrypto.a(c_zlib.o): In functionzlib_stateful_finish':
c_zlib.c:(.text+0x194): undefined reference to inflateEnd' c_zlib.c:(.text+0x19c): undefined reference todeflateEnd'
/opt/lib//libcrypto.a(c_zlib.o): In function zlib_stateful_init': c_zlib.c:(.text+0x224): undefined reference toinflateInit_'
c_zlib.c:(.text+0x26c): undefined reference to deflateInit_' /opt/lib//libcrypto.a(c_zlib.o): In functionbio_zlib_ctrl':
c_zlib.c:(.text+0x4a0): undefined reference to deflate' c_zlib.c:(.text+0x56c): undefined reference tozError'
/opt/lib//libcrypto.a(c_zlib.o): In function bio_zlib_write': c_zlib.c:(.text+0x708): undefined reference todeflate'
c_zlib.c:(.text+0x794): undefined reference to zError' c_zlib.c:(.text+0x824): undefined reference todeflateInit_'
/opt/lib//libcrypto.a(c_zlib.o): In function bio_zlib_read': c_zlib.c:(.text+0x900): undefined reference toinflate'
c_zlib.c:(.text+0x954): undefined reference to zError' c_zlib.c:(.text+0x9e0): undefined reference toinflateInit_'
collect2: error: ld returned 1 exit status
Makefile:94: recipe for target 'redsocks2' failed
make: *** [redsocks2] Error 1

解决方法,修改 Makefile:
override LIBS += -lssl -lcrypto -ldl

改成:
override LIBS += -lssl -lcrypto -ldl -lz

然后:
CCFLAGS=-static make

或者(tomatoware)
LDFLAGS="-Wl,-static -static -static-libgcc" make

编译成功。


Jul 30

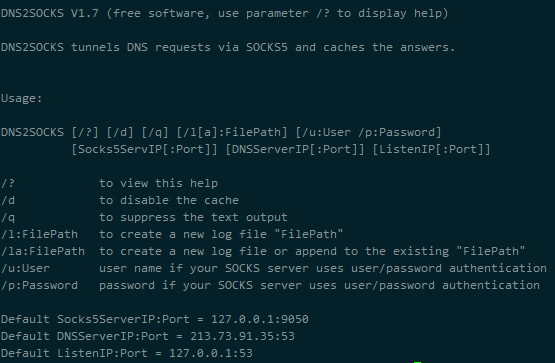
支持 SOCKS5 代理的:DNS2SOCKS

http://sourceforge.net/projects/dns2socks/

dns2socks.jpg

支持 HTTPS (HTTP CONNECT)代理的: DESPROXY-DNS

http://desproxy.sourceforge.net/

dns2https.jpg

能用在什么场合,想用的人自然知道,不多说了。 :evil:

Tags: , ,

[1/3]  1 2 3 >