发布于2019的文章

Jan 25

用编译 Stubby 的方法行不通,因为 Curl 的编译配置文件会发现系统有两个版本的 OpenSSL 而导致编译失败。所以选择 WolfSSL

#wolfssl
./configure --prefix=/mmc --enable-static=yes
make && make install

#Curl
./configure --prefix=/opt --with-ca-bundle=/opt/etc/ssl/certs/ca-certificates.crt --with-wolfssl --without-ssl --with-nghttp2 --disable-ldap --disable-shared --enable-ares
make -j2 LDFLAGS="-all-static -s" LIBS="-ldl"

编译出来的 Curl:

curl2 -V
curl 7.63.0 (armv7l-unknown-linux-uclibceabi) libcurl/7.63.0 wolfSSL/3.15.7 zlib/1.2.11 c-ares/1.15.0 libpsl/0.12.0 (no IDNA support) nghttp2/1.35.1
Release-Date: 2018-12-12
Protocols: dict file ftp ftps gopher http https imap imaps pop3 pop3s rtsp smtp smtps telnet tftp
Features: AsynchDNS IPv6 Largefile SSL libz HTTP2 UnixSockets PSL
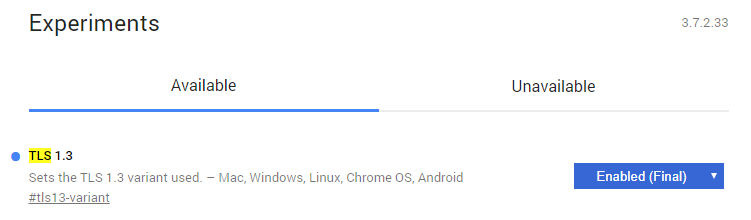
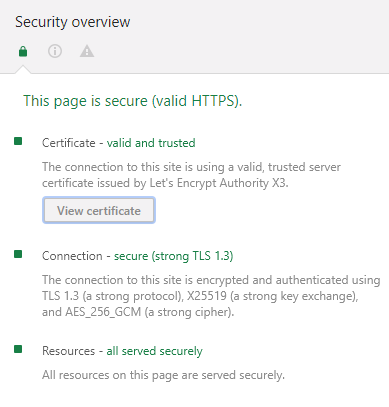
TLSv1.3 测试:

curl2 -I -v --tlsv1.3 https://quakemachinex.com
* Trying 113.67.73.162...
* TCP_NODELAY set
* Connected to quakemachinex.com (113.67.73.162) port 443 (#0)
* successfully set certificate verify locations:
* CAfile: /opt/etc/ssl/certs/ca-certificates.crt
CApath: none
* SSL connection using TLSv1.3 / TLS13-AES256-GCM-SHA384


Jan 08

关于浏览器支持 TLSv1.3 的情况请参考:https://caniuse.com/#feat=tls1-3

主流的 Chrome 70+ 版本支持 TLS 1.3 Final;Firefox 63+ 确认 about:config 中的 security.tls.version.max 为 4;

具体方法:

1. 修改 lnmp1.5 脚本文件
首先是 \lnmp1.5\include\version.sh 文件,将 Openssl_Ver='openssl-1.0.2o' 修改为:Openssl_Ver='openssl-1.1.1a'

2. 使用 lnmp1.5 脚本升级 nginx

进入 lnmp1.5 目录,执行命令:

./upgrade.sh nginx

然后输入需要升级的 nginx 版本号,如目前最新的 1.15.8。nginx 最新版本号可从官网获取:http://nginx.org

静待编译完成。

执行 nginx -V 可查询详细配置信息:

nginx version: nginx/1.15.8
built by gcc 5.4.0 20160609 (Ubuntu/Linaro 5.4.0-6ubuntu1~16.04.11)
built with OpenSSL 1.1.1a 20 Nov 2018
TLS SNI support enabled
configure arguments: --user=www --group=www --prefix=/usr/local/nginx --with-http_stub_status_module --with-http_ssl_module --with-http_v2_module --with-http_gzip_static_module --with-http_sub_module --with-stream --with-stream_ssl_module --with-openssl=/home/vmmate/Src/lnmp1.5-full/src/openssl-1.1.1a --with-ld-opt='-ljemalloc'

3. 修改主机配置文件

ssl_protocols 加入 TLSv1.3 支持,如:

ssl_protocols TLSv1 TLSv1.1 TLSv1.2 TLSv1.3;

ssl_ciphers 参考配置(包含 TLS13 是 TLS 1.3 新增的 Cipher Suite,加在最前面即可;):

ssl_ciphers TLS13-AES-256-GCM-SHA384:TLS13-CHACHA20-POLY1305-SHA256:TLS13-AES-128-GCM-SHA256:TLS13-AES-128-CCM-8-SHA256:TLS13-AES-128-CCM-SHA256
:EECDH+CHACHA20:EECDH+CHACHA20-draft:EECDH+ECDSA+AES128:EECDH+aRSA+AES128
:RSA+AES128:EECDH+ECDSA+AES256:EECDH+aRSA+AES256:RSA+AES256:EECDH+ECDSA+3DES
:EECDH+aRSA+3DES:RSA+3DES:!MD;

文件修改完,重启一下 nginx:

sudo lnmp nginx restart

然后就可以去浏览器访问验证一下。

TLSv1.3 是否开启成功验证:

1、Chrome 70+ 版本打开网站,F12 打开开发者工具,「Security」可以看到 Connection - secure (strong TLS 1.3) 字样信息。

2、Firefox 63+ 版本打开网站,F12 打开开发者工具,「网络」,刷新页面,在「网络」资源列表下随便选中一个本站链接或者打开页面的链接,然后在右侧详细信息查看「安全性」即可看到连接协议版本。

3、在线检测:https://www.ssllabs.com。


Jan 06

Tomato 下面运行需要 SSL/TLS 连接的 Golang 程序(多为静态编译),可能会出现类似:

x509: certificate signed by unknown authority

这样的证书相关问题,目前遇到过的有 overture 以及 dnscrypt-proxy这里有讨论。

主要就是 x509 默认只在以下目录搜索证书:

"/etc/ssl/certs", // SLES10/SLES11, https://golang.org/issue/12139
"/system/etc/security/cacerts", // Android
"/usr/local/share/certs", // FreeBSD
"/etc/pki/tls/certs", // Fedora/RHEL
"/etc/openssl/certs", // NetBSD

或者这几个文件:(https://mirrors.segmentfault.com/golang/root_linux.go)


// Possible certificate files; stop after finding one.
var certFiles = []string{
"/etc/ssl/certs/ca-certificates.crt", // Debian/Ubuntu/Gentoo etc.
"/etc/pki/tls/certs/ca-bundle.crt", // Fedora/RHEL 6
"/etc/ssl/ca-bundle.pem", // OpenSUSE
"/etc/pki/tls/cacert.pem", // OpenELEC
"/etc/pki/ca-trust/extracted/pem/tls-ca-bundle.pem", // CentOS/RHEL 7
}

而 Entware 默认是安装在 /opt/etc/ssl 目录下;

查看 Golang 源码提示可以设置环境变量:

https://golang.org/src/crypto/x509/root_unix.go

const (
// certFileEnv is the environment variable which identifies where to locate
// the SSL certificate file. If set this overrides the system default.
certFileEnv = "SSL_CERT_FILE"
// certDirEnv is the environment variable which identifies which directory
// to check for SSL certificate files. If set this overrides the system default.
certDirEnv = "SSL_CERT_DIR"
)

解决办法:

1. 通过 Entware 安装 ca 证书:

opkg update
opkg upgrade
opkg install ca-bundle
opkg install ca-certificates

2. 在 /opt/etc/.profile 中设置环境变量:

# SSL for Golang
export SSL_CERT_FILE=/opt/etc/ssl/certs/ca-certificates.crt
export SSL_CERT_DIR=/opt/etc/ssl/certs

这样就没问题了。


[6/6]  < 1 2 3 4 5 6